Sunday, November 3, 2013

Pumpkin Art Center

It is amazing what you can find in your closet when you decide to organize it. While cleaning a few months back, I came across a whole bag full of these black foam stickers. There were different sizes of circles and rectangles. I wasn't sure what I was going to do with them, but I stuck them in my art closet to use later. Last week when I was trying to decide what I was going to put in my art center, I came across these foam stickers again. I had a sudden epiphany and decided they would make great pumpkin faces for Halloween. 


I put out some copies of pumpkin templates, some crayons, scissors, and the stickers (in a cute Halloween bucket), and waited for the kids to discover it. The art easels are close to our cubbies, so they are visible to the kids right away when they come in. It didn't take them long to discover the pumpkins and want to start in on them right away.


These are a few of the pumpkins my kiddos made. Many more were proudly taken home to show their moms and dads. This was some great fine motor skills practice for my kiddos. Some of the stickers were hard to peel, which really made them work for it at times, and they were so proud of themselves when they were able to peel the stickers off by themselves! It's was a very popular place to be, and the kids kept returning to the center day after day to create more pumpkin masterpieces!

Saturday, November 2, 2013

Corn Sensory Play


A couple of weeks ago we took a field trip to our local Pumpkin Patch. Needless to say we learned a lot and had a blast. They enjoyed it so much, I still get asked quite frequently when we're going back to the Pumpkin Patch.  While we are there, one of the most popular activities was playing in the corn bin. This inspired me to bring in corn to put in the sensory tub for the kids. I bought ears of corn from our local hardware store and placed a couple in our tub. When the students came in Monday morning and opened the tub, they were greeted with several ears of corn. They spent a few minutes exploring the ears, and then spent several more trying to figure out how to get the corn off of the cobs. It was very interesting watching the kids trying to figure out how they could get the corn off. You could almost see the gears turning as they had to use their critical thinking skills. They tried several different objects around the room to try to get them off, and finally figured out that their fingers worked the best. It was also great fine motor practice for my kiddos. It was fun watching each new set of kids explore the corn and figure out how to get the corn off the cob. We have since added tractors and other farm-related toys to the tub of corn, and still remains a very popular place for the children to gather. 


Wednesday, September 4, 2013

Our Family Tree

I will admit it, I am addicted to Pinterest, and I especially love it when I come across a jewel like the one from  christywallace84.blogspot.com This is my take on the family tree she made. My wonderful associate was a big help in making this happen. She cut a tree trunk out of brown construction paper and then cut circles of various sizes out of scrapbook paper. She then made little branches, which I think is really cute. I have since added pictures of my students' families to the tree, and it is looking wonderful! I've been kind of layering the pictures and overlapping them and it's really coming along as I get more family pictures in! My students love to find their families in the pictures and point themselves out to their classmates. It is a great addition to my classroom and helps bring a homey feeling into the classroom. 


Monday, September 2, 2013

Classroom Reveal


Well, here is the big classroom reveal! We have made it throughout first week of preschool and are getting ready to start our second week! 


Here is a picture looking in the room from the hallway. Straight ahead area our cubbies
 To the right is our kitchen/dramatic play area. Apparently I didn't get a good picture of that area, so I'll have to post another picture of that later.  You can also see our writing area by the whiteboard and our art center by the easels.


Our craft table and shelves for our pencil boxes and our shelves with our manipulatives on it. 


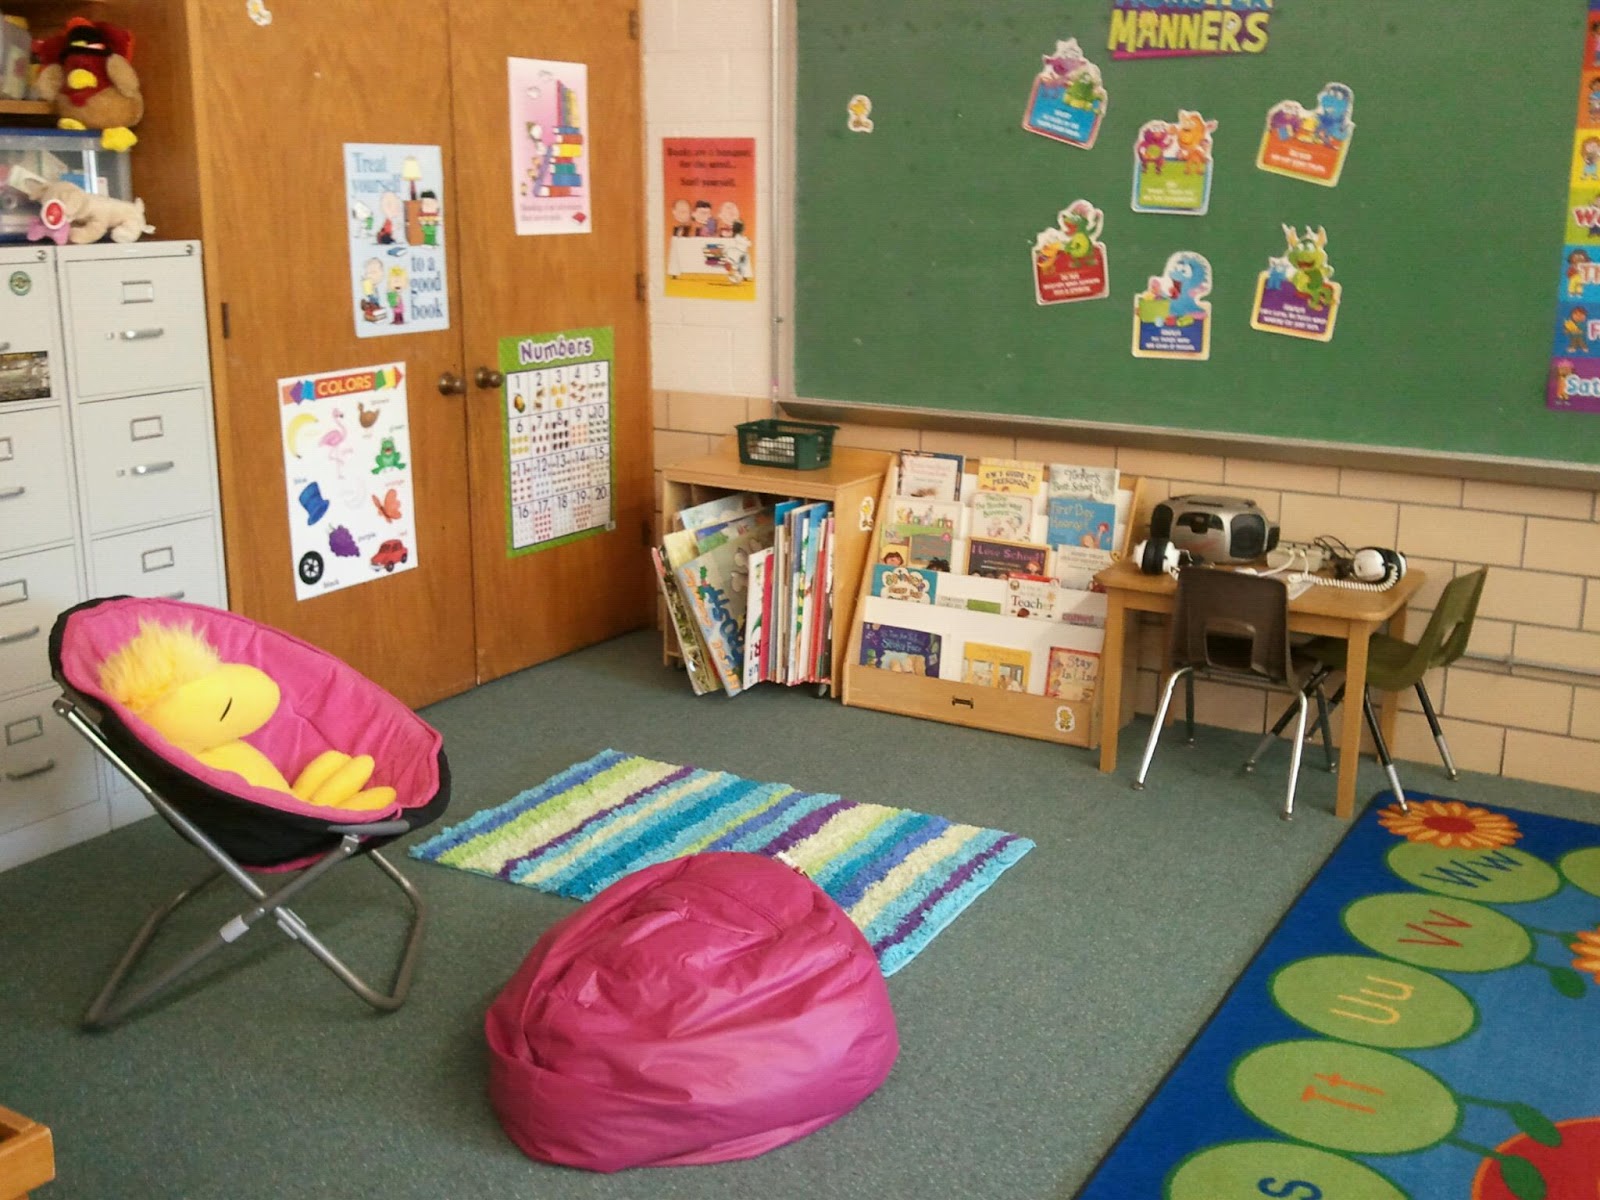
A view of the back of the room, circle time area, reading center, and car table.


A picture of the reading center. I love this area, it definitely turned it a lot cuter this year, and I am absolutely loving it!

A close up of our car table, with other manipulatives, people, animals, etc. This has been one of the most popular places to be this week! The kids have absolutely loved being in this center, especially the boys.


My block and building center. It includes many different types of blocks. The kids have enjoyed the tools and the hardhats this past week. 


Our puzzle center, with our Dora house, which was wildly popular this week, as well!

I hope you enjoyed the tour of my classroom! This was a short tour, I will post more in-depth pictures of the various centers as we go along. 

Saturday, August 31, 2013

Classroom: The Before Pictures

Here are the before pictures of my preschool classroom. 

The back of the room.


The other back corner.


My new closet with our heating and air conditioning units!


The front of the room.


Be on the lookout for the "after" pictures coming out shortly!

Duct Tape Borders

I told you I was in love with fun duct tape! Here's another use I found for this wonderful invention! Duct tape makes a Wonderful border! It comes in lots of different colors and designs and makes for a nice straight border. In the picture below you can see that I used it around my whiteboards in the back of the classroom where I plan to have circle time. As you can see on the top picture, it is on top of the old chalkboard and I didn't like that I could see the raw edges, so I decided to cover them up. This is where the duct tape comes in. It didn't take me very long to put up, and I was very happy with the results!


A look at my completed board all ready for circle time! It's hard to tell from the pictures, but those are actually mustaches on the right side of the board! A look at my finished classroom will be going up within the next few days!

Dry Erase Markers


My preschoolers love to write on the whiteboards and I love to let them. Anytime they want to write, is fine by me! My problem was always making sure that they were using my "special" markers (aka the dry erase markers) on the board. Part of my problem is that some of the new ones look just like the regular markers they use to color with. So, what to do? I have fallen in love with fun colored duct tape this year, as I'm sure you'll see as we go along. I took some of the fun duct tape and wrapped it around the bottom of all my dry erase markers. Problem solved! Now I just have to keep reinforcing that the only markers they can use on the board are the ones with the green duct tape on them!